

Managing Data in the Discovery Environment
The Discovery Environment is connected to the Data Store, allowing you to manage data and directories. To manage data in the Discovery Environment, begin by clicking on the Data icon
![]() in the sidebar. You may be prompted to log in. Once logged in, you
should see your own home directory, in order of folders first, then
alphabetically.
in the sidebar. You may be prompted to log in. Once logged in, you
should see your own home directory, in order of folders first, then
alphabetically.
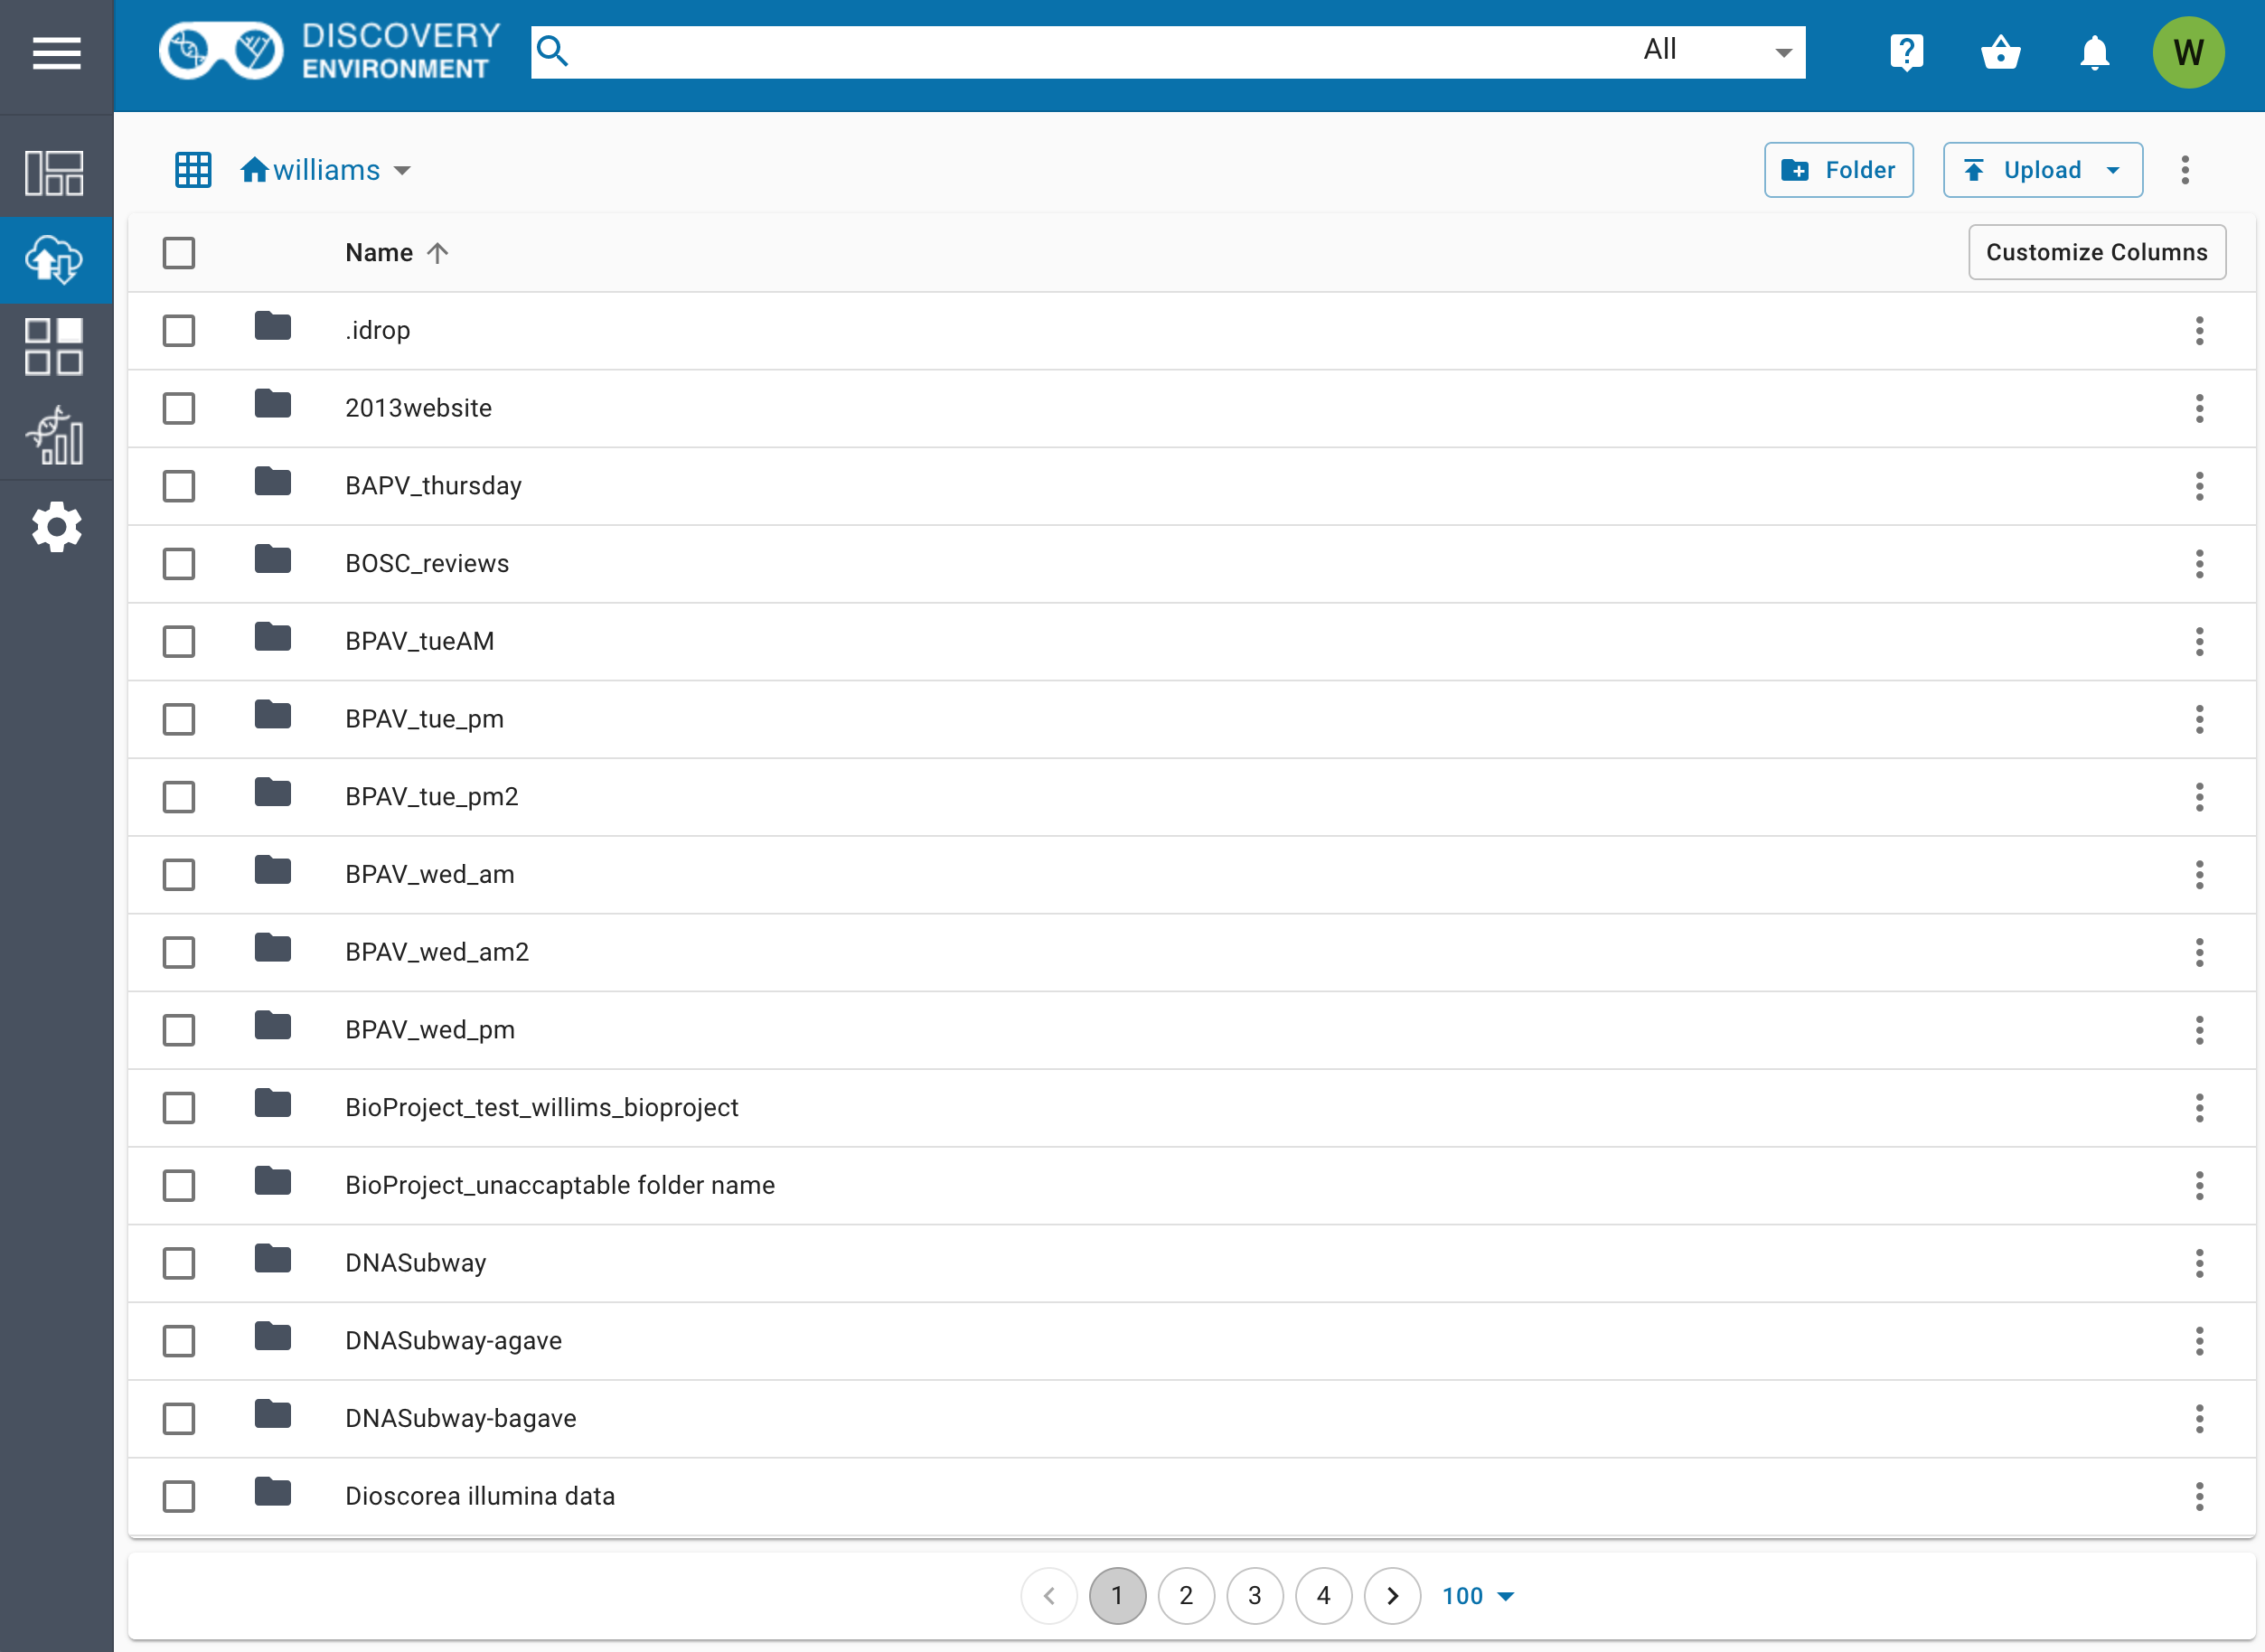
Browsing Data in the Discovery Environment
1. To see more information, press the Customize Columns button to show more columns in the display, such as size or modification date.
2. If the folder you’re viewing has many items in it, the bottom of the screen provides a way to change between pages and set the number of items displayed per page.
3. Click on the name of a subfolder to open that folder. Near the top of the screen, you will see breadcrumbs that indicate the folder you’re viewing and its parent folders.
4. From the top left, at the start of the breadcrumbs, you may select another root folder to view from within your home folder, “Shared With Me”, “Community Data”, and “Trash”.
Viewing Discovery Environment File/Folder Details
- Click the checkbox next to a file or folder to select it.
- With an item selected, there will be a button near the top right labeled Details. Alternatively, click the More Options menu (ellipsis) to the right edge in a file or folder’s row, and click the Details button there to see specific information about the selected item, to copy the path to the item, to add tags to the item, or to set a file’s info type.
3. Click “Permissions” to see your own permissions on the item, and those of other users.
The Discovery Environment allows you to access, view, and manage your files in the CyVerse Data Store. You can upload smaller files, but for large files or large numbers of files, we recommend faster methods such as Cyberduck or iCommands. See documentation for those tools in our Data Store Guide.
Deleting Files/Folders in the Discovery Environment
If necessary, login to the Discovery Environment.
To open the Data view, click on the data icon
 on the left side of the Discovery Environment workspace.
Select the desired file/folder by clicking the checkbox to its left. You can select multiple files/folders.
Click on the More Options menu (ellipsis) in the upper right corner of the Data view and select delete from the pop-up menu. Once the deletion has completed, you will receive an automated notification under the notification icon
 .
.Tip
Deleted files can be retrieved from your Trash folder. You can access the Trash folder by clicking on your username in the top left corner of the Data view.
Uploading/Importing Small Files in the Discovery Environment
In the navigation menu, click the Data button
to access the Data window in the Discovery Environment.In the Data window you will see a directory of files and folders in your Data Store. You may select a folder to be the destination for your uploaded file(s). You may also click the Folder button to create a new folder. If you do not select a destination, files will be uploaded by default to your home Data Store folder (i.e., iplant/home/CYVERSE_USERNAME)
Click the Upload button
 to choose your options for importing files into the Discovery Environment:
- To upload files from your local computer, choose Browse Local; a file browser will open and you may select up to XXX files to upload (XXX MB Max)
- To upload files available at a URL, choose Import by URL; You may paste in a valid HTTP or an FTP URL. Then press Import. You may paste additional URLs or close this window by clicking Done.
Tip
When your Data Store file browser is open, you can also upload files from your computer by dragging them onto your browser window.

4. Once you have begun the upload, you will get an automated notification that files have been queued for upload. You may also view the status of an upload or import by going back to the Upload button and choosing View Upload Queue.
Note
The queue will only display the status of uploads from local files. Files imported by URL will generate a message in your notifications (bell icon, upper-right) when they have completed or if they fail.

Sharing Data with Other CyVerse User(s)
If necessary, log in to the Discovery Environment.
Open the Data view by clicking on

Select the data resources you wish to share with another user; then click the Share button.
In the Sharing dialog that opens, ensure that the resources you wish to share are shown.
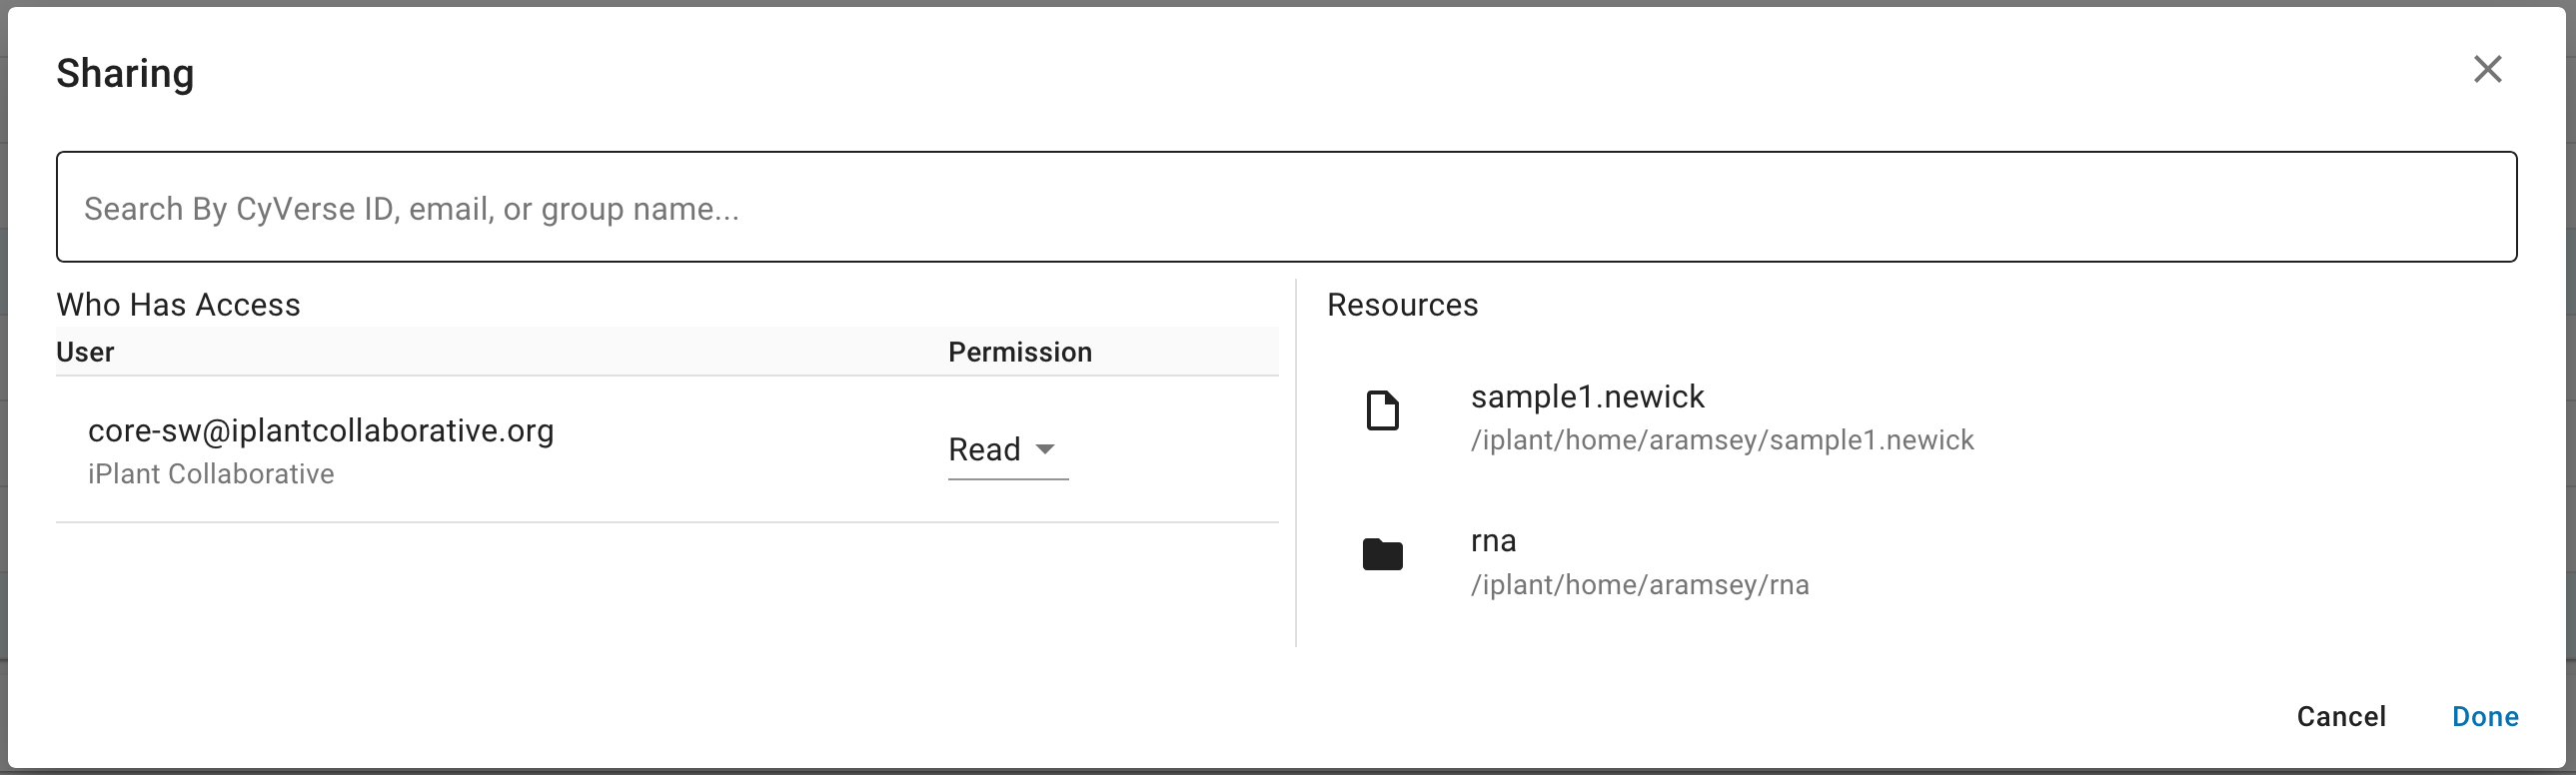
In the Search field, search for the CyVerse user you wish to share with by searching for their CyVerse username or by email address.
Next, under “Permission”, choose which permission you want to grant the person you are sharing these resources with.
Once you are finished, click Done to begin sharing. The user(s) will be notified that resources have been shared with them and will see them in their Shared With Me folder.
Hint
Permissions (based on UNIX permissions) are described in this chart:
Permission level Read Download/Save Metadata Rename Move Delete Read X X View Write X X Add/Edit Own X X Add/Edit X X X
Fix or improve this documentation
- Search for an answer: CyVerse Learning Center
- Ask us for help:
click
 on the lower right corner of the page
 - Report an issue or submit a change: Github Repo
- Send feedback: learning@CyVerse.org